Wednesday, March 11, 2020

Ortal 150 fireplace review - DO NOT BUY

We recently had a new fireplace installed in our home. It's an Ortal 150 dual glass model. The physical unit is attractive, but the there are a number of problems with it and I do NOT recommend this fireplace, because the remote control thermostat mode is terrible, and the fans make too much noise.


The main problem is that the remote control is terrible. Absolutely the worst. The only thing I want to do with a fireplace is put it in thermostat control mode, and have the arrows control the temperature. You can't do this with the Ortal remote.


The reason you can't, is because when it is in thermostat mode, pressing the up/down buttons switches it into manual mode and changes the flame height. Every time you want to change the temperature, you have to hold the SET button (see manual on right), and then change the temperature. However, nobody else knows to do this, so they pick up the remote, push an arrow to change the temp, and they take it out of thermostat mode, and then they ask me why it's not working right.


The next problem is that getting it into temperature mode is confusing.


  • First you have to light the fireplace, by holding UP/ON. 
  • Then you have to HOLD the down flame button for several seconds and wait until it enters pilot standby mode.
  • Then you have to toggle the mode switch to the daytime thermostat mode (not any of the other 4 modes). 
  • Then you have to hold SET and check the set temperature, because it only shows one temperature at a time, normally the room temperature. 
You try explaining that all to your wife, or a kid, or a nanny, or basically anyone. Nobody can operate this fireplace except me. Here you can see how the manual explains all these complicated steps. I read this thing two or three times, and even after that I had to have a fireplace tech explain some of the nuances, and I'm a Computer Engineer.


However, the remote is not the only problem with the fireplace. 

Another problem is that the fans make a ton of noise

This is one of their new cool-touch dual pane glass models. In order to make sure the front pane stays cool, it has fans that blow air up between the two panes of glass whenever the fireplace is on. However, the design of these fans is horrible and noisy. 

First, they are mounted right at the bottom front edge of the fireplace, which obviously carries very well through the wall (even our marble wall). 

Second, they used a continuous row of small-radius blower fans, spanning the entire bottom edge of the glass-gap. On our wide unit, there are six fans. These make a stupid amount of noise. And how much air needs to be blown anyway? I don't need the front glass to be room temperature, I just need it to not burn fingers. A little bit of ducting, and one large radius fan could have been remotely mounted so that it would not vibrate the fireplace or the wall, and would have been virtually silent.  And the sole purpose of the fan is to keep the glass cool, because most of the airflow happens from convection all around the fireplace, due to the required wall openings at the top and bottom.

----

Currently, I'm trying see if I can get the remote replaced with the simple and reliable SIT Proflame 2 remote we have on some other fireplaces, even though it'll involve replacing the whole controller and maybe the valves. I'm not sure if it's possible, especially because our installation is behind marble. 

I hope I can, because dealing with a fireplace this annoying is going to drive me batty. 


Tuesday, March 10, 2020

My Backcountry Alpine Touring Ski Gear Kit

With lift-lines often getting choked full of people, and youtube gopro videos highlighting the splendor of the pure outdoor ski athletes cutting new tracks into pristine snow, Backcountry Skiing is on the rise!


I recently did the research and bought a backcountry touring kit. This page details what I bought, for how much, and why -- in case it's useful for someone else.

If you want to skip right to the gear list, scroll down...

How I started Alpine Touring...

I got interested in Alpine Touring because I liked the outdoors exercise of Nordic XC, but I don't like those unstable thin skis and being stuck on the groomed tracks. A couple weeks ago, I finally had the chance to do some uphill skinning on Alpine Touring skis, inbounds at Aspen Buttermilk. And I really liked it! 

I think trying Alpine Touring inbounds is a great way to start, because you can see what it's like to go uphill without avalanche safety preparedness (or danger). I'm told there is a growing community of people who inbounds skin uphill for the workout, without even being strong downhill skiers. 

I find Alpine Touring more of a workout and less strain than Nordic style cross-country skiing. Those narrow unstable cross-country skis make even shallow uphill or downhill sections really challenging when the snow is hard and fast, and on the flat sections it's really not that much exercise unless you go long distances and spend lots of time doing it. Nordic XC does have some benefits - it's open to more skill levels, you can chat more, there is virtually no avalanche danger, and it's somewhat easier to bring a dog (where allowed). When Nordic XC is done in groomed tracks, it's like running laps at the gym.


In comparison, Alpine Touring gear feels like stable snowshoes with a little glide. They come in various traction-to-glide ratios. With the nylon rental skins, I could just point uphill and walk. 

If my memory is right, my first ascent was about 1700ft vertical in 80 minutes (I forgot to strava). I'm a moderately athletic 45 year old, and I found it much more of a cardio and breathing workout than anything else. On steep sections, I had to breathe heavy and slow or stop to catch my breath. My legs never hurt, but started to get tired near the top. 

Aspen's inbounds uphill policy is pretty flexible. Both Buttermilk and Snowmass allow uphilling during lift operating hours, and they rent (mediocre) uphill gear for $70/day at the base. You don't even need a lift pass. At Aspen you're allowed to bring dogs before lift hours, and on AJAX you can even download dogs (and yourself) on the gondola for free. 

It's not so easy to do inbounds in Tahoe. Diamond Peak's uphill policy allows inbounds skinning before and after lift hours, most other Tahoe mountains don't allow it inbounds at all.

From Inbounds to Backcountry

Inbounds is only the beginning, skinning makes access to the Backcountry possible, though to do this involves avalanche risks and requires serious attention to safety gear and preparedness.

I began my research, and whoa there is both a ton to learn, and a *ton* of equipment out there for backcountry. In addition to specialized skis and boots and bindings, skiing outside the safety of ski patrol (even on day laps) requires a kit of safety equipment. After pouring over tons and tons of gear reviews, and shopping for online bargains to keep the prices down, I assembled my kit.

Alpine Touring has been around for a while, but it wasn't until around 2015 that bindings achived TUV certified DIN safety release settings, and a couple AT bindings came out with alpine-style lateral safety release at the toe, and alpine style pressure heel retention. (I'm speaking here of the Fritchi Tecton, and Solomon Shift). While there is no perfectly safe binding, these newer bindings seemed closer to something I'd take a chance on, especially Salomon Shift, which converts into a full Alpine style binding for the downhill.

I ordered absolutely everything online. I feel a little bad not supporting local retail, but they make it really hard. First, San Francisco is not a ski town, so the selection of back-country gear is pretty poor, and requires driving around to different stores. Even when they had something I want, they didn't have it in my size. Tahoe/Truckee has a backcountry store with great selection, but when I travel to snow, I want to ski, not spend my time shopping or waiting for binding mounting. Second, the prices at retail are hugely inflated. The Jetforce AVA backpack is priced at $1400+tax at retail. I got it for $910 shipped from France, saving $590. That's over 40% savings (or 64% local markup). That's more than the cost of my skis or bindings. Plus, I find it easier to research online reviews at my computer, make lists at my computer, and order at my computer.

The most obvious thing to buy in a local store was the boots, but mid-season shopping for a touring boot was really tough. I visited 3 different San Francisco area stores, and even a backcountry store in Aspen, CO, and I didn't find any boots I wanted. I measure a 27.5, but I have a mid-high instep. The Zero G Pro Tour 28.5 bit into my instep and my heel swam. I couldn't get my foot into the HAWX XTD 130 27.5 (though the clerk never suggested to try it in walk mode). A 28.5 Hoji Pro Tour fit decently but doesn't work with the Shift binding. The Lupo Air 27.5 fit okay but had pretty localized shin pressure and i couldn't find any decent reviews. The Cochise 120 fit but is too heavy for what I wanted. The most comfortable boot I found was a Maestrale XT in 28.5/29, but it seemed too roomy. I decided to take a chance and order the Maestrale RS 27.5/28 on Amazon (free returns), as this is a very-popular boot and has the same lower as the XT. If I don't like it I can use it to decide if I want the XT 27.5 or the RS 28.5 -- or give up and wait until I can shop in Tahoe.

The Gear List

The grand total (minus the Garmin I already owned) came to $3457, which is quite a chunk of cash to invest in something new. However, this is around the price of a high end full suspension mountain bike, and most of the safety kit gear will last a very long time. Plus, I think by shopping around online, I saved at least $1000 off retail.

Rental could work for a couple more days, especially for resort uphill. The Dynafit radical setup at Buttermilk was $70/day, and worked fine for the uphill, though I didn't enjoy skiing down on the too-short skiis and chattery pin bindings. While one Tahoe outfitter will rent a "full" backcountry package (with safety gear) for $130/day, this seems more like a way to get gear for a safe intro class, not a way to actually take an avalanche class and brave the backcountry.

The Jetforce Pro electric inflation airbag was a bit of a safety splurge, as I would feel really really dumb being caught in an avalanche without one because I wanted to save money (I can afford it). And one of my friends *only* backcountry skis in powder conditions (which means avalanche danger). The gas canister models are a little cheaper, but only if they are reusable canisters. Disposable canisters cost money and must be discarded periodically or when you fly. I also like the idea of being able to practice inflation and test the gear without worrying about canisters. Getting a good deal on this made it an easier decision.

If one is focused on resort-uphill at a place that allows it during normal hours (or on no snow days), going without an airbag is no more risky than downhill skiing the same resort. 

* All prices are in USD, and include any tax and shipping to San Francisco, CA.

Skis 2019 Line Vision 98 - 179cm 1500g ea $440 from Snowcountry.eu A playful touring ski (mounted -6cm from center).
Boots 2019 Maestrale RS 27.5 1400g ea $648 from Amazon.com Midseason it was hard to find touring boots in my size in the bay area. ** more below
Binding 2020 Solomon Shift 90mm(Black on Black) 860g ea $468 from snowcountry.eu I ordered the Armada black/black, but they ran out and sent me a 2020 Solomon in the new black colorway
Poles BCA Scepter Carbon Aluminum 240g ea $100 from Snowcountry.eu i like the unique snow scraper, and the strap safety release
Skins Pomoco Glide-S Skins 140mm x 180cm 340g ea $208 from skimo.com Highly rated skins.
Light Suptig Diving Light 120g $22 on Amazon Fits a gopro helmet mount, accepts a gopro on top. Light required for morning resort uphill.
Ski Finder Find--me tracer 100g ea $50 from find---me.com innovative ski and rider tracer
Ava Backpack Black Diamond Jetforce Pro Pack 25L 3000g $910 from Telemark Pyrenees A bit of a splurge, but it's for safety, so worth it.
Beacon Mammut Barryvox S 200g $406 from backcountry.com Highly rated. Clear display.
Probe BCA Stealth 300 Probe 320g $70 from Amazon.com
SatComs Garmin Inreach Explorer+ 215g $405 from Amazon.com I already owned this for mountain biking.
CB Radio BaoFeng BF-888S 200g $30 for 2 radios and 4 batteries on Amazon seems better than $180 for bclink radio. I programmed standard bc-link frequencies.
Water Bladder Osprey Hydraulics LT Reservoir 2.5L 170g $35 from Amazon.com much more leakproof design
Saw Fiskars 7-inch Folding Saw 141g $15 from Amazon for snow cuts or utility, only 17cm blade, ill see if I need longer.
MultiTool Polelane Multitool Pliers and bit set 220g $12 on Amazon cheap collision safe compact multi-tool with screwdriver
Safe Scissors Roxon Folding Pocket Knife & Scissors 141g $25 on amazon collision-safe scissors and knife, for first aid
First Aid Kit M2 Basics 150 First Aid - $16 on Amazon will remove scissors, as it's a collision puncture hazard
utility straps Reusable zipties -- $9 on amazon voile straps equivalent, for fixit

Monday, March 9, 2020

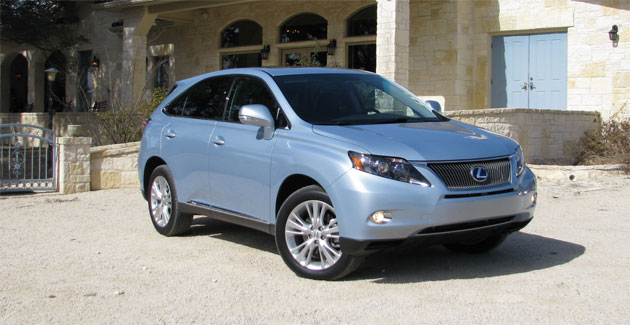
2010 Lexus RX 450h - putting the rear map lights on switched power

Even though it's long in the tooth, we love our trusty 2010 Lexus RX 450h SUV...


....except for one thing.... The rear seat map lights can kill the battery!

Since our kids became old enough to turn on those map lights on their own, they have killed the battery *seven times*.

This problem exists because the map lights in the rear and front seats are all connected to "always on" power, so if you leave them on, they will kill the battery. This isn't something front-seat passengers accidentally do, but those little backseat rascalls do it all the time. And how often do adults think to check the backseat map lights to see if they are turned off? Basically never. And doing so would be hard anyway, because the dome light *is* on, so you'd have to carefully be looking for the map lights separately from the dome light.

I invested in a compact lithium-ion jump start battery, which I've used at least 13 times, because when the battery is completely dead it takes a while before I can charge it enough that it's back to normal. And this car is weird, it's not the easiest car to jumpstart, or to charge. The battery is located in the back, which you can't get to when the car has no juice, because the hatchback has an electric lock. And while I can jump the battery from the front, attempts to charge the battery from the under-hood terminals has never worked for me.

This problem has been such a hassle that my wife wants me to trade in the car (even though it's running great), because she considers it unreliable.

However, I'm a computer engineer, and a hobbyist. After cursing about why these map lights are not wired to a switched power source that goes off automatically, I decided to do a little hack job and fix the problem. Turns out it isn't even very hard, though it does require some skills with a voltmeter and a soldering iron.

First you have to get the dome light assembly out of the roof. Not just the cover, the whole assembly. This is achieved by getting something firm (like a putty knife, or a wide screwdriver, or a plastic pry, under the back lip, and applying pressure. Alot of pressure. Eventually, the clear plastic snap rings will pop loose. You can also pry out the front side (like I did), but this is harder, and the clear snap rings will stay in the back, and they are a pain to get out. Trust me, pry the back out.

When you the light housing out, there is a connector on it which has 4 wires. From the left, negative-maplight, positive-maplight, negative-domelight, positive-domelight. The two maplight leads head to the first maplight switch on the left, while the dome-light leads head to the middle light housing.

The first thing I did was cut all the leads, so I could put a voltmeter on them and test for polarity. After this, I soldered both the map lights and dome light into the two switched lines for the dome-lights. I plugged the connector back in to test, and voila! Now my rear seat map lights are switched with the dome light, so they can't kill the battery anymore.

This is what my assembly looked like after I was done... That's yellow electrical tape over my jenky solder welds.


Originally I was thinking I could leave the negative connected, and swap the positive maplight to the positive dome light. However, this still left the map light always on, which led me to believe the switching is in the negative lead. So I just finished the job, and moved the negative maplight lead over also. It's possible you could move only the negative maplight lead over.

Either way, be sure to over any exposed wire parts with electrical tape or heat shrink, so they don't short. You can see in the picture above that I didn't actually cover the map-light leads, which is a mistake, as if they touch the metal roof of the car, they'll short and blow a fuse. I'll have to pry it open and quickly fix that.